A tidy pantry is the heart of a functional home, not just a pretty sight. Cooking is fun when ingredients are visible, accessible, and categorized. This guide will help you master your space with professional strategies and storage solutions.
Phase 1: The Great Reset
Prior to purchasing a single acrylic bin, you need to conduct a thorough cleaning. Professional organizers swear by the “Empty, Sort, Purge” method.

1. The Total Empty
Take everything out. Yes, everything. You can see the space's potential. The storage can be done without half-used flour bags. And you keep no expired canned goods on the shelves.
2. The Purge
Check every expiration date. If it’s expired, toss it. If it’s a non-perishable item you know you’ll never use (like that spicy mustard you bought on vacation three years ago), set it aside for a local food bank.
3. Categorization
Group similar items together on your counter or floor. Common categories include
- Baking: Flour, sugar, baking soda, chocolate chips.
- Dinner Staples: Pasta, rice, quinoa, jarred sauces.
- Breakfast: Cereal, oatmeal, pancake mix, syrup.
- Snacks: Chips, crackers, granola bars, nuts.
- Canned Goods: Beans, soups, vegetables, tuna.
- Beverages: Tea, coffee, juice boxes, sparkling water.
Phase 2: Choosing Your Storage Solutions
Not all containers are created equal. The key to a sustainable system is choosing the right “vessel” for the right “variable.”
1. The Power of Decanting (Dry Goods)
For pantry storage, decanting food into airtight containers works best.
- Why it works: It eliminates visual “noise” (busy packaging), saves space by removing air-filled bags, and keeps food fresh longer.
- What to use: Use BPA-free acrylic or glass canisters with airtight seals.
- Pro Tip: Choose square or rectangular containers rather than round ones. They sit flush against each other, eliminating “dead space” on the shelf.
2. Tiered Shelving (Canned Goods)
Canned goods are the easiest items to lose at the back of a shelf.
- Solution: Use 3-tier expandable spice liners or can-specific gravity feeders.
- Benefit: Tiered risers allow you to see the labels of the back row over the front row, ensuring you never buy a fifth can of chickpeas “just in case.”
3. Turntables (The Lazy Susan)
Corner spaces are where pantry dreams go to die.
- Solution: A Lazy Susan is perfect for oils, vinegars, honey, and condiments.
- Benefit: With one spin, the item in the very back is right in front of you. This prevents sticky spills from hiding in dark corners.
Pokipo is producing Lazy Susan's alternative productions for your organization:
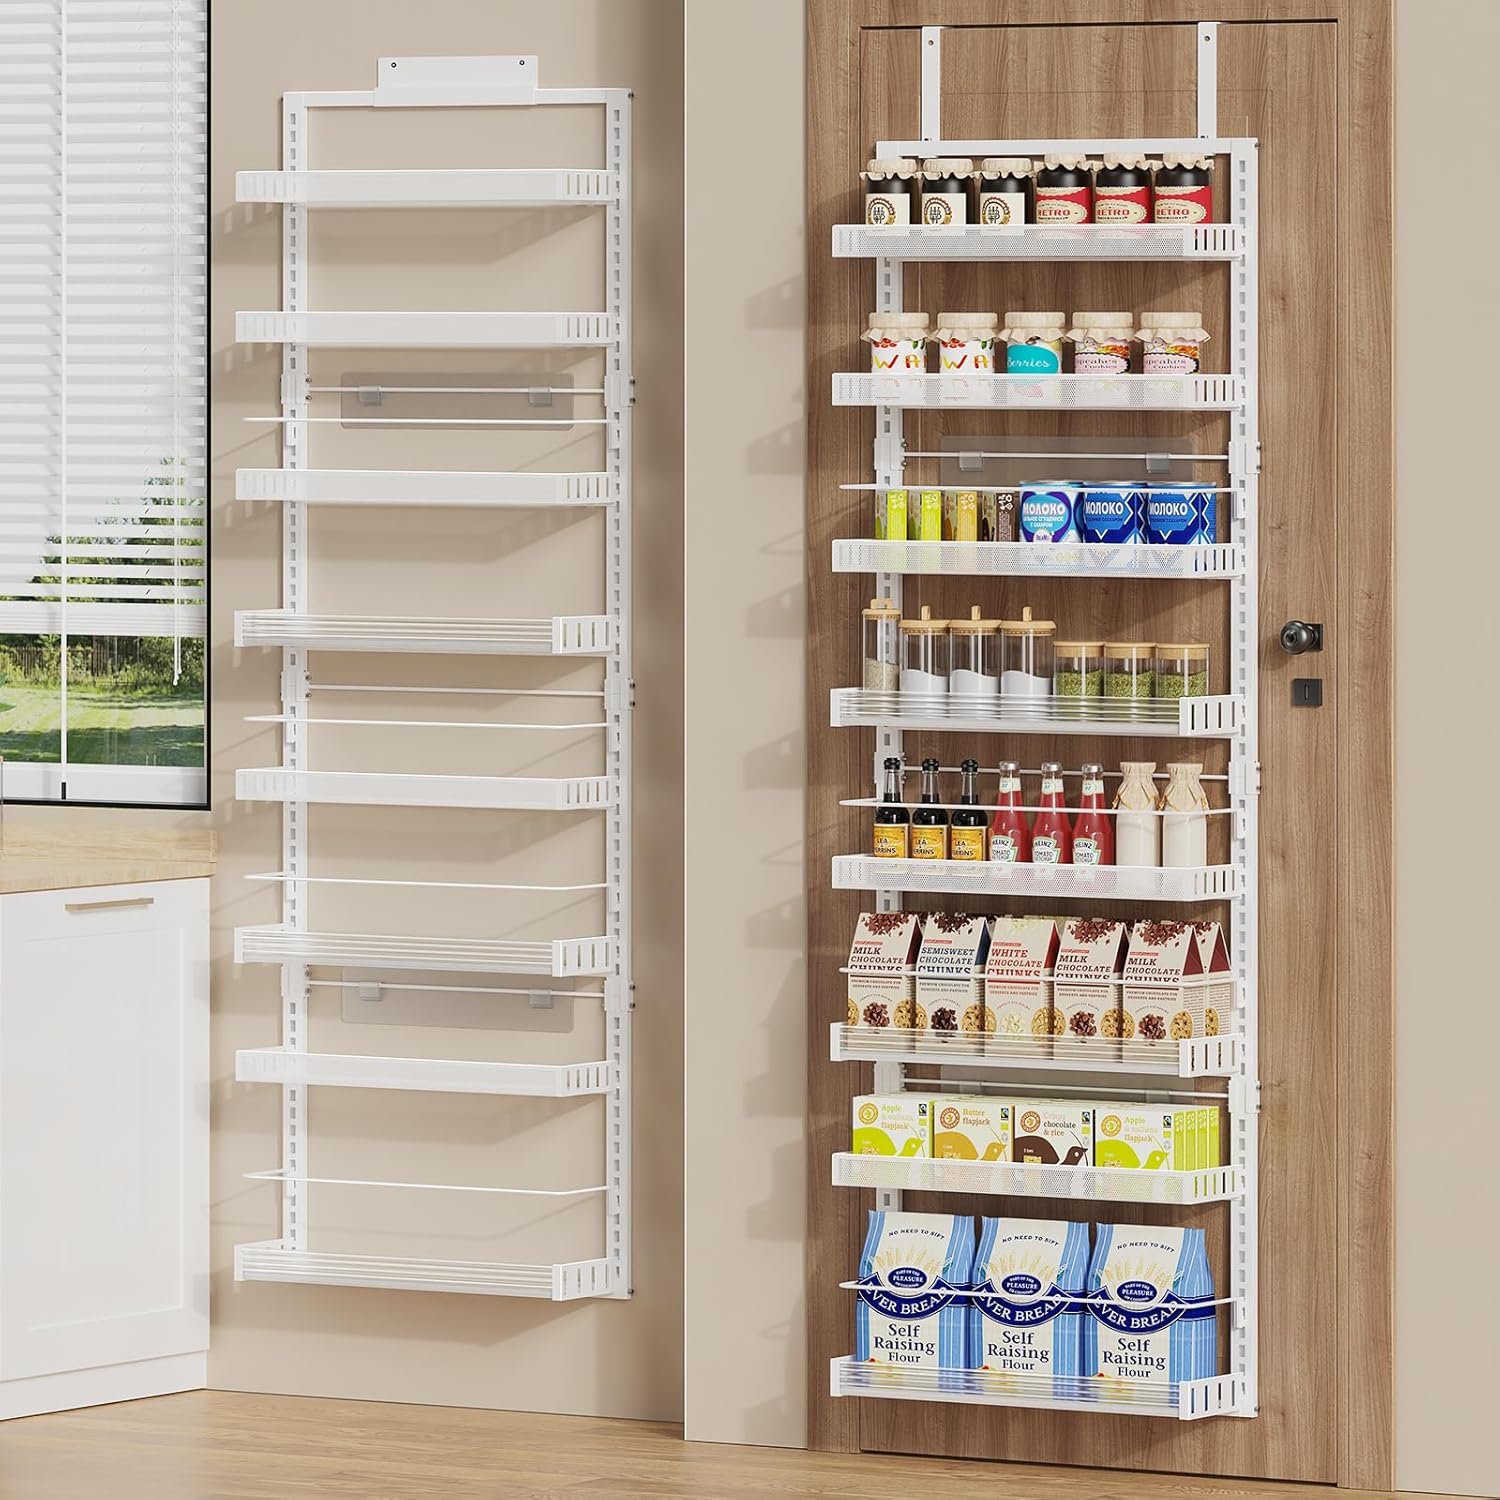
8-Tier Over-the-Door Pantry Organizer – Large Wall-Mount Spice & Storage Rack, 2-in-1 Heavy-Duty Adjustable Metal Baskets
4. Baskets and Bins (The “Hidden” Clutter)
For items that aren't easily decanted—like bags of chips, packets of seasoning, or extra boxes of pasta—bins are your best friend.
- Wire Bins: Great for onions and potatoes (they need airflow) or for seeing exactly what’s inside.
- Woven/Wicker Bins: Perfect for a high-end look; use these for items you don't need to see through, like backstock or paper goods.
- Clear Acrylic Bins: Ideal for snacks and juice boxes so kids can see their options.
Phase 3: Zonal Organization
The layout of your pantry should be dictated by the frequency of use. Imagine your pantry divided into three vertical zones:
The Prime Zone (Eye Level)
This is the “valuable real estate.” Kindly arrange the items you use daily in this area. This section usually includes cereals, coffee, frequently used grains, and school-lunch snacks.
The Low Zone (below the waist level)
Heavy items or kid-friendly items should go here.
- Heavy Items: Gallons of oil, bulk bags of rice, or heavy kitchen appliances.
- Kids’ Station: Create a “self-serve” bin with healthy snacks at a height your children can reach. It fosters independence and keeps them from climbing the shelves.
The High Zone (above the Head Level)
Reserve the top shelves for items you use infrequently.
- Seasonal Items: Thanksgiving platters, Christmas cookie cutters, or picnic supplies.
- Backstock: Extra paper towels or bulk-sized items from warehouse stores that you use to refill your primary containers.
Phase 4: The Art of Labeling
A pantry without labels is just a collection of mystery jars. If you think you'll remember all-purpose and bread flour, you won't.
- Uniformity: Use a consistent labeling style. Whether you use a high-tech label maker, chalkboard stickers, or minimalist vinyl decals, keep them the same. This process creates a sense of calm.
- Important: Write the expiration date and cooking instructions. When decanting, write instructions such as “1 cup rice to 2 cups water” on the back of the jar.
Phase 5: Maximizing Small Spaces
If you don’t have a walk-in pantry, you have to get creative with “found” space.
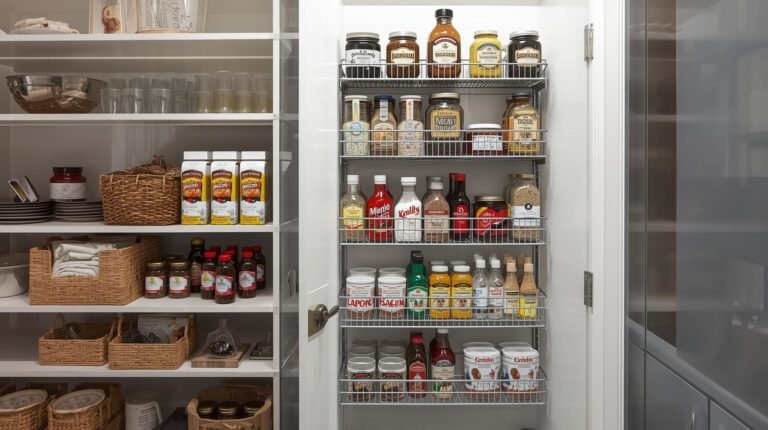
1. Over-the-Door Organizers
The back of a pantry or kitchen door is an untapped goldmine. Use a heavy-duty over-the-door rack to store spices, jars of peanut butter, or rolls of aluminum foil.
2. Under-Shelf Baskets
If your shelves are spaced far apart, you’re wasting vertical air. Slide-on wire baskets can hang underneath a shelf. It can hold flat items like tortillas, bread, or napkins.
3. Pull-Out Drawers
For deep, narrow cabinets, consider installing “roll-out” wooden drawers. No more crawling to the back of the cabinet to locate the pot. All you need is a chest with “roll-out” wooden drawers.
Phase 6: Maintenance (The 5-Minute Rule)
The hardest part of pantry organization isn't the setup—it's the upkeep.
- The One-In, One-Out Rule: When you buy a new item, immediately decant it and recycle the packaging. Don't let boxes pile up “for later.”
- The Weekly Reset: Straighten rows and move items with shorter expiration dates. Please arrange them at the front of the shelf five minutes prior to shopping.
- The Seasonal Deep Clean: Every three to four months, wipe down the shelves and examine them for any hidden spills.
Summary of Essential Tools
| Item | Best Used For | Material Recommendation |
| Airtight Canisters | Flour, sugar, cereal, and pasta | Glass or BPA-Free Plastic |
| Lazy Susans | Oils, vinegars, and sauces | Bamboo or Acrylic |
| Tiered Risers | Canned goods and spices | Expandable Metal or Plastic |
| Open-front bins | Snacks, potatoes, and onions. | Wire or Sturdy Plastic |
| Labels | Everything | Vinyl or Chalkboard |
Final Thoughts
Pantry organization is not a one-size-fits-all project. It is a living system that should evolve with your cooking habits and family needs. Start small—perhaps with just the spice rack or the snack bin—and build momentum from there. Once you experience the peace of a streamlined pantry, you’ll wonder how you ever cooked without it.